
Aperture, Shutter Speed & ISO Explained...
Photography Tips #2, #3 & #4
Ok then, so this is the part that once you understand, you're well on your way to taking images of high standard!
Good morning all fellow readers! Yes, I'm awake at 12.00pm on a Sunday afternoon but hey IT'S SUNDAY!!
I am going to be writing today's blog as promised on Aperture, Shutter Speed and ISO and I will be explaining them as well as using images (yes off google, then over the series of this blog, i'll start sharing my own!)
Lets start by explaining Aperture.
Aperture Explained
Right! Here we go!..

When someone, especially a photographer talks about Aperture or Depth of Field (DoF) they are specifically talking about how much of the scene appears to be sharp or in focus. Controlling this is one of THE most creative aspects of photography as it can completely transform the image you're trying to capture.
Classic examples of DoF include portrait photos whereby the person is in focus and sharp and the background is blurred (this is a shallow DoF)
Aperture explained in slightly more detail.
The aperture of the camera is the size of the hole which lets the light through the lens. The larger the aperture size the greater amount of light hits the camera sensor, the lower the aperture size the less amount of light hits the camera sensor! Pretty simple huh?
 |
Aperture size in a lens.
The aperture size within a lens has been unified into a standard unit called F-Stop. (This personally is what I find confuses most people!!) The smaller the F-Stop number the larger the physical size of the aperture is for that lens. Here is an example for you.
F-Stop of f/1.4 is a LARGE aperture which lets alot of light in and creates a SHALLOW Depth of Field where by a large F-Stop .. (lets say like on the above photo F/32,) this produces a SMALL aperture which has a LARGE Depth of Field which means the scene is more in focus.

*Depth of field is defined as the distance between the furthest and closest objects within a scene.
Wow, ok, now I didn't think that this post would be this long JUST on aperture! And we still have THREE more things to go over!!
Moving on to now Shutter Speed
Shutter Speed Explained

This one I find alot easier and alot shorter to explain! No where near as long and in detail as the Aperture and Depth of Field.
Basically, the amount of light reaching your cameras sensor is controlled by two things, both aperture value and shutter speed! Now the Shutter Speeds in DSLR cameras can vary between 1/8000th of a second to 30 Seconds!!!
Little bit more detail!
For action stopping shots you tend to use a shutter speed of 1/250seconds or shorter where as a shutter speed of 1/15 seconds or longer are great for blurring moving subjects such as waterfalls or grains of sugar being sprinkled on strawberries.
.jpg)
ISO Explained
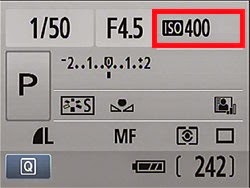 Ok, Now ISO can be described as the amount of sensitivity of the sensor to the light. For the best image quality (I personally find) is to stick to ISO100. Also only really increase the ISO if necessary as when you do increase this, you will find that your photos turn out very grainy! (not a very good look to be fair!)
Little bit further for you to read!
Some people say that keeping your ISO low (Between 100 and 400) if the subject you are capturing is stationary as it will provide you with alot less grain but like I say, I personally just keep mine on 100, or if I'm being really lazy then I tend to put it on AUTO (hehehe!) Well, usually with ISO you don't really have the need to change it but what it does when you change it, is it increases the sensors sensitivity to the light and enables you to use faster shutter speeds but at the compromise that the photos will become alot more grainy and ''noisy''
 |
| This is an example of high ISO and a low ISO. Spot the difference between the two. The higher the ISO the more ''noisy'' the photo looks, and the lower the more clearer and clean cut the photo looks. |
I hope you enjoyed todays blog! Some point next week I will be doing a blog on the ''Exposure modes''!
Lots of Love
Charliie
xx